Sniper! The word has sent chills down the spines of millions of soldiers. In ASL, the word can have a similar—albeit usually non life-threatening—effect on players. Most of us naturally fear the worst, the death of our best leader, or the Recall of our most important armored fighting vehicle (AFV). However, these are just two of many possible effects that a sniper can have on play. As I am continually reminded each time that I make a rule book “dive,” there are some things that I have forgotten, or just plain never grasped. My intention here is not to explain how snipers work in ASL. That would require a more lengthy post. Instead, what I would like to do is provide an overview of what snipers are capable of doing to an enemy unit. In other words, once your sniper is activated, what affect will a die roll (dr) of “1,” or “2” have on the target of your attack. The answers may surprise you.
Multiple shots, and possibly one kill
When I was a teenager the appearance of sniper counters in the Squad Leader (SL) series of games generated quite a buzz among players. These “übercool” ½” counters debuted in Cross of Iron, the first gamette in the SL series. Each counter represented an individual sniper. The neat thing was that we got to direct the fire of each sharpshooter.
 Snipers would start the game hidden. If revealed by an enemy sniper check, they would appear onboard concealed. Each had a firepower of one, a normal range of eight, and a unique dice-roll modifier (DRM). The best had a -4 DRM. The DRM was halved for long-range fire, and doubled for point-blank fire (PBF)! Bye, bye 10-3 leader. It certainly was a hoot to KIA an enemy leader on a roll of eight or less (adjacent and in terrain with no positive modifiers). But the fact that we could select a particular leader from within a stack tended to give us a level of omniscience, or knowledge that even snipers with optical sights did not enjoy. Granted a sharpshooter could often identify the relative rank of an individual. However, it would have been extremely unlikely that he could have known which officer, or non-commissioned officer (NCO), was the more experienced or better leader.
Suffice it to say that these sniper counters were not very good at modelling the effects of snipers in combat operations. From a game perspective, the 1-8-8 counter gave players far too much control over this lethal asset. Occasionally, these units, especially the lower quality ones, were used for purposes never intended by the designers of the game.
 |
| Canadian Pte L.V. Hughes |
Historically, snipers operated on their own, or with another sniper/observer. Commanders often used them to conduct reconnaissance, or to observe and monitor enemy activity. Sniping was conducted far less often in proportion to these other activities. Additionally, once a sniper made a kill, he (or in some cases, she) usually would reposition, and refrain from further sniping until enemy activity returned to normal. In SL there was no incentive for players to conserve their snipers for the next battle. We therefore fired them as often as opportunities to cause grief to our opponents appeared.
Random rifleman
The pedigree of the ASL Sniper counter is evident. However, the mechanics by which a Sniper is activated and strikes in ASL bear no relation to the way SL employed snipers. The most striking difference is that the ASL counter is not a unit. It cannot deny control of a location, nor can it be used to claim Line of Sight (LOS). It has no impact on routing either. In spite of its specific nationality colour, it is best to treat the Sniper as a generic system counter. Until activated, the counter is merely a placeholder. It functions as the point of origin for determining which hexes are eligible for attack when the Sniper is activated. Until that moment, the counter is nothing more than a threat. Indeed, as Mark Nixon pointed out in his welcome “Hyper Sniper: a SANe Look at this Threat in ASL,” it is a manageable threat.
Snipers are manageable in ASL in so much as each player retains some control over where his or her Sniper counter is placed at the start of the scenario. A player may also forfeit a Sniper activation in favour of repositioning the Sniper counter. Admittedly there are restrictions on where a player may place the counter. However, these restrictions help mitigate unrealistic or “gamey” play brought about by a player’s ability to see virtually the entire battlefield. This cuts both ways, however, as players can use what Mark Nixon refers to as “Sniper abatement” tactics to minimize the risk of a Sniper targeting a key unit. Granted in certain cases a player will have some limited control over which target a Sniper attacks. But for the most part, the target of a Sniper attack is chosen randomly, not deliberately.
The inSANity
In ASL, a Sniper attack may occur whenever a player rolls the Sniper Activation Number (SAN) of the opposing player. Scenarios include a SAN for each side, found in the order of battle portion of the scenario card. Occasionally scenarios—especially those featuring only AFV—may have a SAN of “0.” In all cases, however, the SAN is found inside a set of braces, for example: {SAN: 3}. An activation may occur during any fire phase, and at any time during the Movement Phase (MPh). The trigger is an Original dice roll (DR) equal to the enemy SAN. All Morale Checks (MC), Task Checks (TC), as well as To Hit (TH) and entrenching attempts qualify. Were that not enough, a DR resolved on the Infantry Fire Table (IFT) [EXC: offboard artillery] may also trigger an enemy Sniper activation.1 The basic sequence is as follows:
- place Sniper counters, DEFENDER2 first—conditions apply [A14.2]
- qualifying DR equal to SAN triggers Sniper activation
- player whose Sniper is activated (hereafter the Sniper player) rolls one die
- dr ≥ 3 is no effect
- dr ≤ 2 results in a Sniper attack
- Option A: forfeit attack and reposition Sniper—conditions apply [14.2]
- Option B: make a Random Location DR to determine target hex
- determine eligible target(s)—Random Selection [A.9] may apply [A14.21-.23]
- resolve attack, along with any subsequent attack(s) due to Random Selection [14.3]
- resolve any counter-sniper action: Sniper Check [14.4]
There is a lot going on in some of these steps, but I would like to focus on the actual resolution of a Sniper attack. I will, however, refer to the preceding steps as these pertain to a particular aspect of resolving the attack.
The same dr that generated the attack is used to resolve it. This dr is not subject to modification. Hidden units are immune to Sniper attacks. Concealed units are not. Interestingly, concealed units do not derive any benefit from being concealed, and therefore suffer the same effects as unconcealed units. There is an upside, however. A concealed unit in a Location attacked by a Sniper retains concealment unless it is selected [A14.23] as the target.
A Sniper attack may also effect enemy units in Melee with no risk to friendly units. In addition to the results in the table below, a Sniper attack always places any broken units in the target Location under Desperation Morale (DM).
Why are you picking on me?
The first thing that I would like to draw your attention is to what may happen if a SMC is eliminated. If the SMC is some form of hero [EX: A15.2, G1.42, or G1.424], elimination is straightforward. However, if a leader—including a heroic leader—is eliminated, his death may trigger a chain reaction, beginning with a Leader Loss Morale Check (LLMC) [A10.2]. All Personnel units stacked/ moving with leader at the moment of his elimination may have to take a LLMC. There are situations where LLMC do not apply, in Melee, for example. So check section A10.2, if you are unsure.3
A LLMC is compulsory for all units whose current Morale Level is lower than that of the eliminated leader. For example, if a 9-1 leader were to break, a broken SS 6-5-8 stacked with him would not be required to take a LLMC because the squad’s broken Morale Level is the same as the leader’s Morale Level. The same would not be true for an unbroken SS 6-5-8 because the Morale Level of this squad was one less at the moment the 9-1 leader was eliminated.
Things can get interesting if a LLMC results in Heat of Battle [15.1], or Bail Out [D6.24]. Things can get positively “insane” if a LLMC triggers another Sniper activation, another attack and yet more LLMC. As the rule book reminds us, a Sniper attack is not considered resolved until all sniper attacks generated due to Random Selection results, including all LLMC/Leader Loss Task Check (LLTC)/Heat-of-Battle/Bail-Out DR, etc. are complete.4
At first blush a wound result on a SMC may appear to be a relative blessing because there is no LLMC associated with a wound. However, remember that a SMC must still check for Wound Severity [A17.11]. Should a leader succumb to his wounds as a result of the Wound Severity dr, LLMC may apply after all. Furthermore, there is nothing in the rule book to suggest that the Morale Level of the leader at the time of his demise would be lowered due to being wounded. Put another way, do not try to “sleaze” your way out of a LLMC by telling me that your 9-1 leader in my previous example will not trigger a LLMC because he was “momentarily” an 8-0 leader before he succumbed to his wounds. This may work with other players, but until Perry “sez” otherwise, I am not budging.5 :-)
Dumdum bullets and shoot to kill
Let’s have a look at some of the other results. Because any sniper attack will eliminate a Dummy stack, snipers can provide valuable intelligence during the game by exposing dummy positions. In my view, this result elegantly models the reconnaissance function of a sniper team.6
 |
| Experimental ultra-light tank |
In a similar fashion, the ASL Sniper rules are able to model counter-sniper activity. Although pinning an enemy Sniper may well seem like a booby prize, it can be important in large scenarios, especially those populated by weapons with a high rate of fire. A pinned enemy Sniper is also welcome when your opponent has a high SAN. But if you are lucky enough to get an elimination result on your opponent’s Sniper, then one of two things will occur. If the enemy SAN is greater than two, your opponent’s SAN is decreased by one. If your opponent’s SAN is two, the enemy Sniper is removed from play [A14.4].7
Stunning sniper
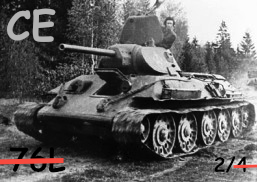
The first page of a Tiger tank owner’s manual ought to include a warning about opening a hatch when a Sniper is in the vicinity. Apart from anti-tank weapons, the deadliest anti-tank asset on an ASL battlefield is the humble Sniper. An attack by a Sniper will automatically Stun the crew of a fully-armored AFV. Close-Topped or Opened-Topped, if the crew is exposed (CE), they can be hit. The Morale Level of the crew—nine in the case of a Tiger tank—is irrelevant, as is the Morale Level of any Armor Leader present. Snipers treat the crews of all fully-armored AFV with equal indifference. More troubling, when faced with multiple possible targets in a particular Location, the Sniper player has the option to target the enemy sniper, a Vulnerable Inherent Crew, or an unarmored vehicle [A14.2]. Faced with an enemy Sniper—even one with a SAN of seven—a Tiger crew, and an Opel Blitz truck, I would go for the Tiger crew every time.

There are two grades of Stun. What I tend to refer to as a “baby” Stun occurs whenever a Sniper attacks with a dr “2.” When Stunned, an AFV must immediately close its hatches. The game term for this is: Button Up (BU). If moving or in-Motion at the time, the vehicle must also immediately stop. No Movement Point (MP) is expended; the AFV just stops. Once Stunned, an AFV may not fire or move for the remainder of that Player Turn. Thereafter, the crew suffers a permanent handicap in the form of a +1 DRM. The handicap is a game mechanism designed to reflect that fact that the crew is less efficient due to one or more crewman having been wounded.8 If the crew is small to begin with, then a Stun presents a far more serious problem.
 |
| MR35 Renault in Italian service |
Many early-war AFV such as the French Renault R35 were fitted with a one-man turret (1MT), normally occupied by the vehicle commander. Tankettes such as the Italian L3/35 were manned by just two crewmen. Naturally, if the commander of a 1MT, or a crewman of a tankette, were to become wounded or incapacitated, the fighting efficiency of the AFV would be degraded significantly. As you might expect, ASL has a solution for such situations. The game also has a mechanism for handling situations where an AFV is stunned a second time. In all cases, the crews of these AFV suffer the normal consequences of a Stun. In addition, the crews of AFV with a 1MT may not regain CE status for the remainder of their time onboard.
 |
| A L3/35 tankette in German service |
Some tankettes, as indicated on the back of their respective counters—the Italian L3/35 is a case in point—are likewise restricted. More importantly, because the crews of these AFV are no longer combat effective (including those who have been Stunned twice), they suffer an additional penalty. The official term for this combat result is Recall [D5.341], which brings me to my next point.
 Whenever a Sniper attacks the crew of a fully-armored AFV with a dr “1,” the crew suffers what I like to call a “big” Stun. A big Stun works the same as a baby Stun. The difference is that, the vehicle is also Recalled from battle. Recall represents a state where the crew of an AFV has suffered too many casualties to continue even with a degraded combat ability. This explains why AFV with a 1MT, or a small crew, suffer a Recall result on a dr “2,” while standard AFV do not. ASL simulates this serious loss of combat effectiveness in a number of ways. First, any Armor Leader [D3.4] present in the AFV is eliminated, including any present in a 1MT, or a tankette such as the L3/35. Second, the AFV must attempt to exit the playing area along any Friendly Board Edge via the shortest route in MP.9 And third, if an AFV is bogged or immobilized at the time it suffers a Recall, the crew must Abandon [D5.4] the vehicle instead during its next MPh. Crews of these Abandoned AFV are not required to exit the playing area, but they are prohibited from re-manning their Abandoned AFV [D5.341].10
Multiple hits? Gimme a break
The effect of a Sniper attack on a MMC is fairly self-explanatory. But this being ASL, you would expect exceptions. And you would be right. Some MMC do not break; they suffer Reduction instead. There are two types of Reduction. The first type is the most common, and is associated with a unit that is in an altered state. For instance, a broken, berserk, or unarmed MMC will not break as long as it remains in its altered state. If it exceeds its Morale Level on a MC, it is Casualty Reduced [A7.302]. A squad that suffers Casualty Reduction is reduced to a half-squad (HS); a HS or crew is eliminated. Therefore, whenever a Sniper attacks a broken, berserk, or unarmed MMC with a dr of “1” the unit suffers Casualty Reduction.11
The second type of Reduction is associated with MMC that Step-Reduce rather than break. At the moment, the only MMC that Reduce in this manner are the Japanese [G1.11] and the Chinese (CPVA) in scenarios set during the Korean War [W7.21], with Step-Reduction applying only to squads and Infantry crews. Therefore, a Sniper dr of “1” will eliminate (that is, Casualty Reduce) a Japanese HS or vehicle crew, but only Step Reduce (or “stripe”) a Japanese squad or Infantry crew [G1.11].
We have a similar issue where pinning is concerned. A Sniper dr of “2” will pin most MMC. However, there are a great deal of situations where a MMC is not subject to pinning. The list is lengthy, so I will mention only a couple of the more interesting ones here. Units undertaking particularly brave or foolish activity such as a berserk charge [A15.42], or a Human Wave (HW) are immune to pin results. Motorcycle Riders are also immune, although bicyclists are not. Interestingly, AFV Riders are particularly vulnerable to a pin result, and not just one caused by a Sniper. If pinned, an AFV Rider must Bail Out [D6.24]. Of course, if the former Rider fails its MC, it will no longer be pinned. But I hardly think that being broken and under Desperation Morale is much by way of compensation.12
Tin cans and pin cushions
Perhaps the most problematic Sniper results are those that affect the Inherent crew of an unarmored, or partially-armored vehicle [D1.21-.22]. There is nothing complicated about the effects of a Sniper attack on one of these targets. If selected, the Inherent crew of such a vehicle will either break or pin, depending on the Sniper dr. In case you are wondering, being BU will not spare the crew [A14.22].
 |
| The gunshield of the sIG IB 150mm assault gun provides its crew with a +3 CE DRM versus fire that enters through the vehicle's front Target Facing |
The problem stems from players occasionally confusing a partially-armored vehicle with a fully-armored one. I am also certain that I have seen this played incorrectly in the classic scenario Le Hérisson, which stars the imposing sIG IB self-propelled artillery vehicle.13 (There appears to be a sIG IB at the beginning of the video below.) The vehicle sports a massive gun shield. While this shield affords the crew with above average protection from some fire, it provides no protection against fire emanating from the rear. More significantly, the upper superstructure Aspect [C3.9] of the rear Target Facing is unarmored. Therefore, for the purposes of a Sniper attack, the Inherent crew of a sIG IB will break or pin when attacked by a Sniper.
The same oversight can occur with a number of German tank destroyers, including the PzJg I, and certain models of the Marder (two glimpses of which, can be seen in the video above).14 Clearly, the absence of armor leaves the crew more vulnerable to fire than a fully-armored AFV. However, this “Achilles heel” also makes these vehicles more resilient to Sniper attack because they are never Stunned and/or Recalled—not a bad trade off in my view.
 |
| The FlaK/Pz IV fielded a 37mm anti-aircraft cannon |
The 37 FlaK/Pz IV has a similar resilience, but only when in “Firing” mode. The armored shields of this self-propelled anti-aircraft gun must be lowered to provide the Main Armament with an unrestricted field of fire. But once the shields are lowered, the crew is no longer considered to be in a fully-armored vehicle. In fact, the crew is so exposed that they are treated as being in an unarmored vehicle.15 The outcome of a Sniper attack on this Flakpanzer therefore depends upon which mode the vehicle is in at the time of the attack. When the armored skirts are down, a dr “1” will only break the crew. When the armored skirts are up the same dr will Stun the crew, and Recall the vehicle. Given the severity of a Recall result, it pays to read the vehicles notes of your AFV before you begin play.
Flat out immobilized
The last point that I wanted to touch on was the ability of a Sniper to immobilize an unarmored vehicle. Only a dr “1” will do; a dr “2” has no effect. Moreover, a Sniper attack has no additional effect on an unarmored vehicle that is already immobilized. Happily, the Sniper player may ignore an unarmored vehicle that contains no Passengers, Riders or Crew (PRC), and opt for the next closest target. The other thing worth remembering is that the Sniper cannot attack an unarmored vehicle and its PRC with the same dr. But as I mentioned earlier, the Sniper player has the option to choose certain targets over others. Considering that a dr “2” will have no effect on an unarmored vehicle, the obvious choice is to pin the crew. Depending on the tactical situation, it may be better to immobilize the vehicle with a dr “1” and spare the crew. At other times, breaking the crew is paramount. The important thing to remember is that you have a choice.
 |
| Partially-armored SdKfz 10/5 with 20mm cannon |
Finally, always remember to consult the vehicle notes before play. Those nifty SdKfz 10/5 AA halftracks in Valor of the Guards are partially-armored. Unlike a SdKfz 10/4, a Sniper cannot immobilize a SdKfz 10/5. However, in both cases, a dr “1” will break the crews of these vehicles.
I hope that this post has given you a better appreciation for what the trained marksmen is capable of in ASL. Although we do not have as much control over our Snipers as we may like to have, we nevertheless retain more control than the average battlefield commander. Understanding what the Sniper is capable of is the first step in learning how to leverage this asset for maximum gain.
Memory aide
 |
| One-spot on Sniper die |
Some years ago, I created a Sniper die that I can use whenever I get a Sniper activation. The precision die features designs on two faces. In lieu of the one-spot, is a grave marker (a helmet on a cross) representing a KIA, or elimination result. The image is framed by the four effects of a Sniper dr of “1.” “Elim” is short for elimination, and refers to the elimination of a SMC. To reinforce the fact that a dr “1” is a big Stun that Recalls the CE crew of a fully-armored vehicle, I wrote the word “Stun” in uppercase letters. The word “Break” represents the result suffered by a MMC or the Inherent crew of an unarmored or partially-armored vehicle. The term also does double duty for those MMC that Reduce rather than break. “Immob” is the ASL abbreviation for immobilized, the effect of a dr “1” Sniper attack on an unarmored vehicle. The abbreviation also serves to remind me that in a Location containing an unarmored vehicle, an enemy Sniper, or a Vulnerable Inherent Crew, I always have the option of selecting one of these targets to attack. In spite of the presence of other units in the same Location, I do not have to resort to Random Selection. I simply declare that my Sniper is attacking one of these targets types.
 |
| Two-spot on Sniper die |
The two-spot of the Sniper die has no pips. Instead, there is a Red Cross symbol in the center of the face. Because a Sniper dr “2” has no effect on vehicles, the design displays only three effects. While I could have included “Elim” to represent the elimination of Dummy counters, I felt that this would only add clutter and confusion. The die therefore summarizes the other main effects of a dr “2.” They are: wounds a SMC; Stuns the CE crew of a fully armored vehicle; or pins a MMC (not immune to Pin results) or the crew of an unarmored or partially-armored vehicle.
BattleSchool also carries a minimalist version of the Sniper die in 12.5mm. The 16mm version adds a Wound-Severity function. In doing so, it dispenses with the symbols on the ace and deuce (two-spot), and reincorporates pips into the design, pips that are important for determining the severity of a wound. To make the die more intuitive, colour pips remind players at a glance what the outcome is.
 |
| Click to enlarge |
Further reading
Nixon, Mark C., “Hyper Sniper: a SANe Look at this Threat in ASL,” reprinted in Out of the Attic 2 (MMP: 2010), pp. 33-37, 43.
Notes
1. A “DR that can yield no game result than a SAN is not made [EXC: the DR required for an attack negated by blocked LOS (A6.11) is made.] However, the effects DR of an Ordnance attack may also trigger a Sniper activation, provided the effects are resolve on the IFT. A To Kill (TK) DR never does. In this respect ordnance fire that is resolved on the IFT can be something of a double jeopardy. Because SAN applies to both the TH attempt DR and the IFT result DR, one runs the risk of activating the enemy Sniper twice with just one shot.
2. It was only when I read section A14.2 again today that I finally grasped the subtlety of “DEFENDER” in this context. Until now, I always had assumed that the defender in a scenario—the side charged with keeping an attacker from obtaining his objectives—was required to place his Sniper counter first. But this is not what the first sentence of A14.2 is telling me. It matters not who is defending or attacking in a particular scenario. Indeed, some scenarios have neither a Scenario Attacker nor Defender. (Look it up in the index if you have not already done so.) What does matter is who moves first in a scenario. The side moving first always places its Sniper last. It is the DEFENDER in the top half of Turn 1 who must always place his Sniper first.
3. As with everything ASL, there are always exceptions. Some Personnel units neither cause nor take LLMC [EX: Riders A13.52, D15.55, or Climbers B11.42]. While others, such as passengers of a vehicle, can only affect passengers of the same vehicle. I recommend that you review A10.2 for a more exhaustive list of exceptions.
4. In case, like me, you wondered when a Leader Loss Task Check (LLTC) might come into play, the short answer is not very often. One situation that could give rise to a LLTC is one where two leaders with different Morale Levels are stacked together. Should the leader with a higher morale be eliminated due to a sniper attack, the other leader would be required to take a LLMC. If this leader were to break as a result of the LLMC, any unbroken MMC stacked with him with a current lower morale would be required to take a LLTC. Like I said, I cannot see this happening very often.
5. For those who do not know, I am referring here to Perry Cocke, co-owner of Multi-Man Publishing. Perry is the reigning authority on the interpretation of ASL rules. Hence if something is so, it is because Perry sez so.
6. Granted players will frequently use Dummy counters as “sniper bait” in order to absorb or redirect a Sniper attack. However, when Dummy counters are used for this purpose, they provide another useful piece of intelligence. Such usage also diverts limited deception resources from elsewhere.
7. As rare as this may seem, it happens more than you might think. I recall a game earlier this year where my opponent’s SAN was three. Within the course of a turn or so, my Sniper struck twice, and the enemy Sniper was no more.
8. The DRM applies to all TH attempts, MC, Task Check (TC), IFT, CC, and Overrun (OVR) DR. Note that Carrier crews never BU; they are always considered CE [D6.84]. In addition to not being able to move or fire while Stunned, the crew of a Stunned AFV cannot attempt to repair any malfunctioned weapons. This seldom comes up during play, but is possible if, for example, an AFV is Stunned during a pre-game bombardment [C1.82].
9. The AFV may not stop, except to unload Riders/Passengers, which it must do as soon as possible after the Recall result. Otherwise, the AFV must remain in Motion (that is, use Motion Status [D2.4]) until it has exited. However, the AFV may not use Excessive Speed Breakdown (ESB) [D2.5], either to exit sooner, or in an attempt to deliberately immobilize the vehicle. As an aside, the Recall mechanism in ASL is in keeping with historical practice. An AFV was a valuable asset, and its crew required specialist training. Neither was easily replaced. Most commanders would hesitate to squander these resources. Moreover, armor would often retire from an engagement in spite of what the operational commander might prefer. While this may irk some players, I think that the Recall mechanism is a good representation of what occurred during combat.
10. Technically, a crew that Abandons an AFV due to a Recall result could re-crew a different vehicle, but if it did so, it would still suffer the effects of having been Stunned earlier, namely the +1 DRM in note 8 above.
11. Wading Infantry also suffer Casualty Reduction on a Sniper dr of “1” [G13.42]. In certain cases, Infantry entering a frigid Water Obstacle will suffer Casualty Reduction (EX: heroic or unarmed units) [B20.7], and Passengers of a boat will also Casualty Reduce instead of breaking [E5.54].
12. Others include: Calvary [A13.52], berserk MMC [A15.42], participants in a Banzai [G1.5], Climbing [A11.4], Fording [B21.41], or Wading Infantry [G13.42], Passengers of a boat [E5.54], and swimmers [E6.1]. Paratroops are immune from a Sniper attack of any kind while represented by a parachute counter [E9.32].
13. German vehicle note 78.
14. German vehicle notes 43, 46 and 47.
15. German vehicle note 85.
In addition to Mark Nixon's ASL article above, you may be interested in some additional literature on snipers. The first title below provides an illustrated overview of snipers in the 20th century. Its chief value is that it is an inexpensive introduction to snipers of the period and provides a reading list if you want to explore the subject in more depth. It also contains brief biographies and photographs of some of the more famous snipers of WWII.
The second work is a classic. My copy actually belongs to a friend I served with in Somalia. (Hunter, if you are reading this, email me, I have no current contact details for you.) If you have not read "One Shot, One Kill" yet, you are in for a rich and detailed look inside the world of snipers. The book chronicles the service experiences of a number of American snipers from WWII through to Beirut in the 1980s.
"A Rifleman Went to War" is another classic, and a personal favourite. I picked up a brand new hardback copy in 1993. It is hard to find, but well worth the read. The rifleman of the book's title is an American officer who joined the Canadian Corps as a private during the Great War. He became a top sniper, repeatedly turning down a commission so that he could continue to do what he loved best. This is no gloomy Sassoon or Blunt memoir. McBride embraced his trade. His autobiography provides a wealth of detail with respect to sniping and life in the trenches. I cannot recommend this one enough. Amazon has a feature where you can browse portions of these books. Have a look.

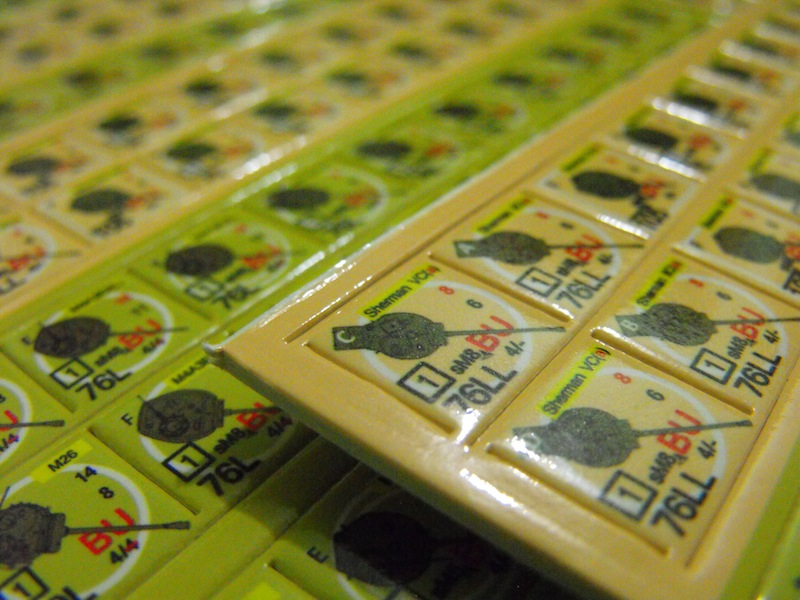
 The first module also uses a less satisfactory method of punching the counters. This is the same method used in Avalon Hill (AH) modules such as Yanks. I do not like it because I am left with a bit of cardboard to trim from the sides of the counters. To be fair, the problem is not as pronounced as on AH counters. For some reason the punch used for Module A does not leave cardboard on all four sides of a counter like the AH punch did. Module B avoids this problem by using a punch that leaves the counters attached only at the corners. This is industry standard. It is encouraging to see that Countersmith heeded customer feedback and made the change before producing a second module.